I know, it's been a while since I last put up a post. But I haven't had a lot to talk about until today. Well, that's not entirely true. But it would have been really depressing to read since it would have consisted of whining and pissing and moaning about how horrible it was. Mind you, I'll talk about it anyway, but it won't be as horrible to read since I'm in a much better mood now.
So! Since last we talked, I passed my aluminum shoes. Full set of four fullered shoes. Aluminum is really easy to work with and responds well to the hammer. There's just one problem with it...if you leave it in the fire too long, it disintegrates. It doesn't melt, mind you. It just falls apart. Like when a part of a soft cookie breaks off and falls to the ground. So you have to hold it in the forge with your tongs and count to 15 seconds. Then you drag the butt end of your hammer across the aluminum and if it leaves a black mark, the metal is hot enough to work. If it doesn't leave a mark, you put it back for 5 more seconds and check it again. Never do you set it down. Or as Bill put it, if you look away from it, it's been in the fire too long.
I spent all last week working on those. One of the fronts fell apart on me, so I had to make another one. And technically, my fullers were too far inside for a couple of spots on the fronts. But Bill was feeling generous and passed me anyway because he understood my intention and the metal was kind of thin to hold a proper fuller. Those passed on Saturday of last week, so then it was on to bar shoes for me!
Now, the next burning question: What's a bar shoe and what's it used for? Well, the best way to describe a bar shoe is to imagine a regular horseshoe, then put a solid bar of metal across the bottom connecting the heels. It's used in cases where the heels are having a problem of some kind and need to be protected or if the horse needs more support on the foot than a regular shoe. A good example is a horse that's been staying here at the school for about a month now. This horse had a big section of his hoof that he caught in a wire fence and ripped off. The hoof wall was dead on the outside of his right hind foot from about the middle of the quarter on that side all the way back to the heel and all the way up to almost the hairline. The whole hoof wall, right in to the sensitive structures underneath. So we took a Dremel tool and pared out as much dead hoof as possible, though some had to remain so that a shoe could be nailed on. Austin made a bar shoe and nailed it on so that the horse would have something to support the foot while the hoof wall was missing. Repairing the hoof with acrylic wasn't possible at first because of infection. If you cover up an infection, if only gets worse because there's no way to treat it externally and the bacteria breed like crazy in an oxygen deficient environment. The bar shoe supported the foot by distributing the weight better across the foot where the hoof wall was missing. Once we got the infection out, Austin applied an acrylic to the foot to make a fake hoof wall. Apparently, you can rasp it and nail a shoe into it just like a normal foot. As the new hoof grows out from the hairline, the acrylic will be trimmed and rasped off from the bottom as though it were part of the hoof until the new hoof grows all the way out. Cool, huh?
So, back to me and bar shoes. I've been hearing from a lot of people that the hard part isn't shaping the shoe, it's welding the ends together at the bottom. That's right, forge welding. Basically, you take the ends of the metal, bring them together, apply flux, get everything yellow hot, then tap it together to weld it. On a bar shoe, the two ends meet in the middle of the bottom bar between the heels. And everyone told me that was the bitch of the whole thing. Well, I tried it today. And got a solid weld first try. *grin* I credit it to Alberto, who gave me the demo Thursday morning and some great tips. Like brush all the slag off before applying the flux and make sure the anvil is hot before welding because otherwise the anvil will suck all the heat out of the metal and the weld won't hold. And you have to tap the weld line gently at first and gradually increase the power of the strikes. So now I just have to make a second bar shoe and get them passed. Once I get that, I'll have completed all the minimum forge requirements for the 12 week program. There's still 4 more shoes I can learn to make after that, egg bar shoe, heart bar shoe, aluminum bar shoe, and patton bar shoe. But I don't have to complete the list, just up through regular bar shoes. It's a good end to a week that started really crappy.
OK, here's the part where I tell why I haven't posted in a while. This week started pretty horribly. On Monday, they popped a graded barn day on us. I was assigned two front feet. I had to trim them to my satisfaction, then call an instructor over to grade my trimming. Then, I had to make a pair of fullered shoes with toe clips and fit them to the horse, then have an instructor grade the shoes and the fit. Finally, I had to hot fit them and nail them on and have an instructor grade the finished product. Took me all friggin' day! I'm not fast at making shoes. I've gotten a little faster since, but I've been practicing since that day. I can knock out a pair in an hour now. Which is still kind of slow, but I'm trying to balance speed with nailability. If they want it faster, the shoes probably wouldn't nail on because of shoddy workmanship. And I hate doing things half assed. But on Monday, it took me closer to 2 hours I think to make my shoes. Ugh!
Then, on Tuesday, we got the client in that always wants clips on their horses. I had a pair of hinds that day and the horse was a leaner. This big fat ass horse putting all his weight on me and I was trying to fit hind shoes with quarter clips. Let's just say that I was conducting primal scream therapy in the barn that day. I was the last one under a horse and frusterated as hell. The shoes weren't fitting well, my clips looked like crap, and did I mention the horse was a leaner that didn't like to pick his feet up? It's hard to burn on a shoe when the horse doesn't cooperate. You have to be able to hold a really hot shoe on tongs with one hand and pick up the foot with the other. Then you put the shoe on the foot and hold your breath, because the smell of hot shoeing is horrible. Imagine the stink of rolling up hair into a cigar and smoking it. The smoke comes up off the foot and right into your face, so you're working half blind and not breathing. If you make the mistake of opening your mouth, you can taste it in the back of your throat. >.< For those of you that have ever smelled your clothes after being in a smoky bar or nightclub, this is worse. Even my bra smelled of fried hoof, and that was through my t-shirt.
This might make a few of you surprised. I basically told one of my dormmates she could kiss my ass today. I know I've talked about the barn princess Isabelle before. Well, today I was hunched over looking at my horse's feet to make sure the angles visibly matched on the feet. I heard this voice from behind me saying, "Is that really necessary, sticking your ass in my face?" Without looking back, I replied, "Yes, it is. I'm checking my horse's feet." I then walked to the other side of the horse to check from the other side and added, "You can kiss it while it's there if you'd like." All I heard back was this terse little "No, thank you". But I was grinning like a bandit, let me assure you! Makes me glad I only have to put up with her for another two weeks.
That's right, I'm almost out of here. Two more full weeks. I probably won't be able to pass the time limit for the practical portion of the journeyman's test, but we'll see. And anyway, Jerry agrees with me that quality is better than quantity. I've discussed it with him and he assures me the quality of my work is quite good, so I'm happy with that. =) And I know that with time and practice, I'll just keep getting better. I've been able to work on horses with chronic founder and crappy feet and make them better. And with the success of my welding today, I now have the basic skills to make many more shoes that a vet may require for therapeutic purposes. I do hope to get the basic shapes for egg bar and heart bar shoes even if I don't actually make them so that I can practice once I leave here. Time will tell, hmm?
This is me, signing off.
Friday, October 29, 2010
Saturday, October 16, 2010
Fun with Sliders
Much coolness!
So, having passed my sliderettes and gone on to sliders, I passed them on the first try, too! They passed last Monday, so I started in on my fullered shoes. I know, I know...what the hell's a fuller?? Well, if you look at a normal mass produced horseshoe, they have grooves on each of the sides that the holes sit in. Those grooves are fullers. In other words, my shoes now have to have grooves for the holes to sit in rather than just having the holes flush with the surface of the shoe. Yes, there's special tools used to make fullered shoes.
I worked all week on my fullered shoes, because I wanted to get them right and because the metal used is slightly thicker than what I was previously using. And because I had to turn in a full set of four, a pair each of fronts and hinds. The first shoe I worked on I had to scrap because the fuller was too far to the inside and it wouldn't have nailed on. Wait, wait, I know...what do you mean 'too far to the inside'? Well if the holes are too far toward the inside edge of the shoe, they won't drive into the hoof wall. They'll drive into the sensitive part of the foot and then all kinds of problems ensue. The horse's foot will bleed, it hurts the horse, and it could potentially form an abscess. Nails don't go into the sole or the white line, they go in the hoof wall. So the nail holes have to be far enough to the outside of the shoe that it nails into the wall, but not so far out that the shoe is unstable because there's not enough metal left to hold the nail in the shoe. Tricky, huh? Yes, even in making shoes there's a catch. lol! But back to fullered shoes. I finished the full set today and they passed first try. So now, my next shoes to make are a full set of aluminum fullered shoes. Tomorrow's task...
The other cool thing that happened was that on Friday, we had two horses come in that needed slider plates put on. One horse already had sliders on, so that one turned into a reset. The other needed a pair made, and that was the horse I was working on. Park got the reset. Just luck of the draw, by the way, and not engineered that way. Though it was guaranteed that we were the ones to work on those two horses, since we're the only two that were here that could even make sliders. Anyone else that could make them was off at a forging and shoeing competition down in Texas. From what I hear, they're doing pretty damn good, too. Alberto has been placing first and second and Jonothan got a third place. I'm not there because I'm not terribly fast at either forging or shoeing. I place quality over quantity.
So! It looked like I was going to have to push the envelope of my forging skills and knock out a pair of sliders as fast as I possibly could. Then we measured the horse's feet. 5 1/2 inches on the diagonal. Double that to 11 inches, then add 1 1/2 inches to account for the fact that it was sliders, and that was the length of steel needed to make a shoe that fit. Wait a minute...that makes 12 1/2 inches...I used 12 1/2 inches of steel for the pair I made that passed...
Yep, you guessed it. My pair of sliders got slightly widened and put on a horse! All by myself. Coolness! Of course, now I have to make another pair of sliders as display pieces, but that's not a big deal. The big deal is that I got to put my own handmade shoes on a horse all by myself! And I did a good job, too, imho. Yes, photos are following, further down in this posting. *grin*
 First, this is the pair of sliders I made. Yes, the ones that went on the horse, so I don't actually have them anymore. But like I said, I'll make another pair to show off. And remember what I was saying about the nail holes and notice how far out to the sides of the shoes they are. That's where the hoof wall actually sits with respect to the shoes.
 This is a slider compared to a sliderette. The slider is the fat one on the left. Notice the shape is the same, just the widths are different. Sliders make nice flat surface for reining horses to slide on when they make that sliding stop. The toe is also either rolled or rockered so that it doesn't dig into the ground like a blunt surface would. Probably the toe of the sliderette is also supposed to be either rolled or rockered, but I'm not certain and they didn't tell me to make it that way so I didn't.
 This is the actual shoe on the foot. If you look close, you'll see the trailer of the shoe extending past the heel of the foot. Yes, it's supposed to look like that. I believe we discussed that in a previous blog, but this is what it looks like. The horse was very good about letting me put the sliders on, except for leaning on me some. With all his heavy muscls developed from sliding, his butt was somewhat heavy...
 Now, some of you have asked what it looks like when I'm shoeing the horse and how I hold the foot. While this isn't the best picture of that, it does serve to somewhat illustrate how I hold a hind foot to work on it while at the same time showing off the slider I put on that particular foot. If you look close, you'll see that my left elbow is actually hooked over the top of the horse's hock and his lower leg is running down the side of my left hip with his fetlock tucked into my crotch. Yes, this is the most comfortable position to work in. The horse's leg is supported by my legs quite well, which leaves both my hands free to work on the foot. My legs are together down to the knee, so my thighs make a stable platform, while having my feet spread and pigeon-toed in gives me secure footing. Go ahead and try out the position yourself and let me know how long you can stand crouched down and pigeon-toed before your legs start to shake. Trust me, I can stand for a lot longer now than when I started.
 By comparison, this is how I work on a front foot. The position is similar, but the foot is gripped beteen my thighs. Holding on to the toe of the foot gives me a stable platform for working. And it's also the best point of control if the horse starts to pull the foot away. This was a different horse on a different day, by the way. But the concept is the same for every horse. Again with the closed thighs and pigeon-toed stance. This one is a better example of just how bent over I am when working, though, as on the other photo I was done with the foot and just showing it off. This one, I was actually working on the foot at the time the photo was taken.
 These are the fullered shoes. The photo's not the best, but you can somewhat tell that there's grooves in the sides where the nail holes are located. The top pair are fronts and the bottom pair are hinds. Fancy, huh?
 And this is a comparison between a basic front shoe and a fullered front shoe. The basic is on the left. The astute observer might notice that the basic shoe has three holes while the fullered shoe has four. Why? I don't know. That's just how I was instructed to make it. But looking at it from the perspective of someone that has to put it on a horse, four nail holes are better. Why? Because in order to affix a shoe firmly to a foot, you have to use three nails. Now, you could use the shoe that has only three holes, but what if you quick the horse? When that happens, you can't use the same hole again because you've just made the horse bleed. If you have only three holes, you're shit out of luck, now aren't you? But if you have four holes, you've got a spare. And it also gives you choices. What it the hoof is badly broken out just where one of those nails is supposed to go? With four holes, you've got a back up plan in case one of the nails just won't nail on for whatever reason.
Anyway, I think this edition has run a tad long. But there was so much to talk about! As usual, if there's any questions or requests, feel free to put them in comments. I do check, honest. =)
This is me, signing off.
So, having passed my sliderettes and gone on to sliders, I passed them on the first try, too! They passed last Monday, so I started in on my fullered shoes. I know, I know...what the hell's a fuller?? Well, if you look at a normal mass produced horseshoe, they have grooves on each of the sides that the holes sit in. Those grooves are fullers. In other words, my shoes now have to have grooves for the holes to sit in rather than just having the holes flush with the surface of the shoe. Yes, there's special tools used to make fullered shoes.
I worked all week on my fullered shoes, because I wanted to get them right and because the metal used is slightly thicker than what I was previously using. And because I had to turn in a full set of four, a pair each of fronts and hinds. The first shoe I worked on I had to scrap because the fuller was too far to the inside and it wouldn't have nailed on. Wait, wait, I know...what do you mean 'too far to the inside'? Well if the holes are too far toward the inside edge of the shoe, they won't drive into the hoof wall. They'll drive into the sensitive part of the foot and then all kinds of problems ensue. The horse's foot will bleed, it hurts the horse, and it could potentially form an abscess. Nails don't go into the sole or the white line, they go in the hoof wall. So the nail holes have to be far enough to the outside of the shoe that it nails into the wall, but not so far out that the shoe is unstable because there's not enough metal left to hold the nail in the shoe. Tricky, huh? Yes, even in making shoes there's a catch. lol! But back to fullered shoes. I finished the full set today and they passed first try. So now, my next shoes to make are a full set of aluminum fullered shoes. Tomorrow's task...
The other cool thing that happened was that on Friday, we had two horses come in that needed slider plates put on. One horse already had sliders on, so that one turned into a reset. The other needed a pair made, and that was the horse I was working on. Park got the reset. Just luck of the draw, by the way, and not engineered that way. Though it was guaranteed that we were the ones to work on those two horses, since we're the only two that were here that could even make sliders. Anyone else that could make them was off at a forging and shoeing competition down in Texas. From what I hear, they're doing pretty damn good, too. Alberto has been placing first and second and Jonothan got a third place. I'm not there because I'm not terribly fast at either forging or shoeing. I place quality over quantity.
So! It looked like I was going to have to push the envelope of my forging skills and knock out a pair of sliders as fast as I possibly could. Then we measured the horse's feet. 5 1/2 inches on the diagonal. Double that to 11 inches, then add 1 1/2 inches to account for the fact that it was sliders, and that was the length of steel needed to make a shoe that fit. Wait a minute...that makes 12 1/2 inches...I used 12 1/2 inches of steel for the pair I made that passed...
Yep, you guessed it. My pair of sliders got slightly widened and put on a horse! All by myself. Coolness! Of course, now I have to make another pair of sliders as display pieces, but that's not a big deal. The big deal is that I got to put my own handmade shoes on a horse all by myself! And I did a good job, too, imho. Yes, photos are following, further down in this posting. *grin*


Anyway, I think this edition has run a tad long. But there was so much to talk about! As usual, if there's any questions or requests, feel free to put them in comments. I do check, honest. =)
This is me, signing off.
Wednesday, October 6, 2010
Shoes, glorious shoes!
Forgework is finally starting to make sense! I passed my clips Monday and started in right away on sliderettes. And the first pair I made were good enough to pass! So now I'm on to full sliders. My goal is to get a pair made and passed by the end of Saturday so I can move on to fullered shoes. I know, I know, what the hell does all that mean? Well, give me a few to explain. I even have pictures to help illustrate what the hell I'm talking about.
 This first picture is of a basic hind shoe. This one passed at the beginning of last week, which is when I started working on clips. I must have knocked out three dozen clips or so before I felt good about them. The other problem was that I first was using a borrowed clip starter and all my clips were turning out too wide. So I spent $36 and bought a new hammer, a cross pein hammer. It has a normal head on one side and a thin, wedged head on the other. I've been told it can be used for shoe welding too, which was one of the selling points. But more on clips in a minute.
 This second picture is a comparison of a basic front shoe versus a basic hind shoe. The front shoe is the round one on the left, the hind shoe is the more triangular one on the right. You see, a horse's front feet are a different shape than the back feet. These shoes would fit a perfect shaped foot. Of which there is none, of course. What happens in the real world is that you start with a basic keg shoe and shape it to the foot you're shoeing. Some few shoes come preshaped to either a front or hind shape, but a keg shoe is a keg shoe and they only come in one shape. We have to know the basic shapes so that we can form the shoes to at least a close approximation of the foot before final shaping to the actual foot.
 Now, back to those blasted clips. I know I've described them before, but this photo is angled to show them to their best advantage. The top two shoes are fronts with toe clips, the bottom two are hind shoes with quarter clips. Toe and quarter refers to the part of the hoof the clip is touching. The toe is the front of the foot, the quarters are the sides, and the heels are toward the back. These are the full set of shoes that passed. Hell of a lot of work, let me assure you! And then you burn them on to the bottom of the foot. The clips are burned to the sides of the foot, too, so that they sit flush with the outside of the hoof wall.
 Once those were knocked out and passed Monday, I started in on these babies. These are sliderettes. An astute observer would notice that they're kind of similar to hind shoes in shape and you'd be right. That's because sliderettes and their bigger cousins, sliders, are only put on hind feet. They're used in western style riding, during reining comeptitions. You know those sliding stops you see so much in competitions? These shoes are specifically designed to help with those. Sliders are big flat shoes that extend past the heels of the hind feet. The flat surface allows the horse to slide farther, while the trailers on the heels dig into the ground to keep the horse's feet from going out from under them completely and protect the back of the horse's leg just above the foot from dragging on the ground. The only difference between sliderettes and sliders is a quarter of an inch of width. Sliders are fatter than sliderettes.
 This photo is a comparison between a basic hind shoe and a sliderette. Notice how much longer the heels are and how they turn back out compared to the heels on the basic hind shoe. The piece of metal you start with is only an inch longer for the sliderette than for the hind shoe and the nail holes are placed in the same spots for each shoe. Oh, and in case it wasn't clear, the extra metal on each heel is called a trailer. Other shoes can have trailers as well, for a variety of purposes, sometimes even on only one side and not the other. Trailers grab the heels as they hit the ground and direct the motion of the foot, so another reason to have trailers on the sliderettes is to direct the foot into a straight line as they both drag equally. Yes, this means that a trailer on only one heel would direct the foot to turn in that direction. We're learning a lot tonight, aren't we?
Anyway, now that I've filled everyone's heads with more information than they probably wanted to know about shoes, I guess I better wrap this up. It's almost bedtime and sleep is important to me being able to work in the barn tomorrow. Today was a good day and I'm hoping tomorrow goes well, too.
This is me, signing off.
Thursday, September 30, 2010
Something to talk about
Fair warning-there's a rant here today.
I swear. I'm getting fed up with my childish dorm mates. OK, granted, they're 18 and 20. But still, there's no need to prank call someone else's friends when you have a head cold and pretend to be a guy because you vaguely sound like one. Especially when you're too feminine to carry the ruse with verbage. I'm still shaking my head over that one. It's ridiculous. Frick and frack are really starting to irritate the hell out of me. I even refrained from going out to the barn for extra work tonight because I knew they were out there.
And I really need to go out to the barn because I'm quite close to passing my clips. Which have been frusterating the hell out of me. I've drawn probably 3 dozen clips trying to get the technique down. Now I just have to make a pair of front shoes with toe clips and a pair of hind shoes with quarter clips. I'm pretty sure I'll be able to get them knocked out tomorrow, though, because the dimwits usually go out somewhere Friday nights. Despite having barn work on Saturdays, of course.
I also managed to completely knock out two front feet for shoeing in two hours today. Yay! I'm seeing improvement in my shoeing ability, not only in skill but in stamina and ability to stay under the horse. And I know we have more dental floats tomorrow. We watched a video this morning on floating teeth and they let us know that there's 9 floats tomorrow. So we'll be busy. There's seven of us that are on the list for floats tomorrow, me, Park, Alberto, Jade, Jack, Collin, and Sarah. Everyone else either isn't in the 12 week program or hasn't been here long enough yet to get diverted for floats. You have to have been here for 4 weeks before you get to try out floating teeth.
There's 16 students right now, too. Six are new for this week, including another female student named Petra from Holland. She and I get along much better than I do with the idiots. I just don't respect them, that's the bottom line. Petra is closer to my age and that helps, too. We also have a student from Venezuela, two cousins from the Big Easy, one from Kentucky, and I don't remember off hand where the last one's from. Which also means there's lots of tool boxes in the tool room! It also means there's lots of variety in personalities. Fortunately, I seem to get along with nearly all of them, so that's a good thing. And really, I get along with Sarah pretty well. Just...Isabelle...*sigh*.
Anyway, I guess I ought to step off the soapbox. Overall, I feel I'm doing pretty well. And the cold I came down with is resolving through plenty of rest and a little pseudoephedrine, so I'm coming back up to speed. Also, exciting thing! On Tuesday, I got to trim the feet of a thoroughbred yearling that's bound for the racetrack! For those of you that know me, you'll understand how cool that was for me. I got to talk to the owner, too, and while she didn't give any specifics, she did let drop that the yearling's sire is a record holder out at Hollywood Park. Which means his pedigree is probably pretty decent. He had a lot of attitude, so I suspect he'll be pretty competitive. Whether or not he'll have the speed to match is still to be seen. It was pretty awesome, though, to be able to work on a potential like that.
I believe I'll call it a night at this point. It's coming up on my bedtime and 6 am comes earlier than I'd like it to.
This is me, signing off.
Friday, September 24, 2010
Bruising and boogers
Ugh, I think I'm coming down with a cold or a sinus infection or a massive allergy attack or something. Not sure yet, but I woke up this morning and could only breathe out of one side of my nose. Slight sinus headache and some congestion in the nasal area. And phlegm. BUT! Despite this, I was out in the barn with everyone else today, acquiring new bruises on my arms. All week I've had two feet, fronts Monday through Wednesday, hinds yesterday and today. And every time the horse tries to take a foot away from me, I end up with new bruises. I have a pretty big bruise on the inside of my left thigh, about 3 inches by 3 inches, where a mare on Wednesday pulled me around. Today's horse decided I needed a new array of bruising on the underside of my left arm from where he drove his hock repeatedly into my arm while trying to take his foot away. So yeah. Some new aches and pains.
The upside to all this is that I'm getting better at my skills and competance, which means I'm also getting somewhat faster at what I'm doing. The work is hard and physically demanding, but I'm seeing an improvement. Which means that if I can see it, it must be fairly significant. Now I just have to improve on my forge skills. I'm working on drawing clips on shoes. What's a clip, you might ask? It's a triangular protrusion hammered at a roughly 90 degree angle from the metal of the shoe. Typically, shoes with clips have one clip at the very toe of the shoe for fronts or two clips at the front of the quarters on a hind shoe. To make these, you take a shoe, put a dent in it with either a bob punch tool or a cross pein hammer, and then draw out the metal into a triangle by hammering the dent against the anvil. When the shoe is put on, the clip stays against the outside of the hoof wall and helps keep the hoof protected better as well as helping to keep the shoe on and in place better.
Mind you, clips are applied through hot shoeing, which I got a chance to do yesterday. All I can say is don't inhale the smoke that comes off the foot...yuck! Just like it sounds, the shoe is hot when you first apply it to the foot, so the hoof is burned. This provides a better seat for the shoe when it's applied. Stinks like burning hair, though, and the smoke permeates your clothes worse than cigarette smoke. After the shoe is burned on, it's taken and dunked in the water trough before we actually nail it on. So there's no risk of burning ourselves while nailing it on. You just have to be careful while you're setting the shoe. It doesn't hurt the horse, but it's a little uncomfortable to have something that hot on the bottom of your foot. It would be like heating up a paperclip and putting it against the top of your fingernail for a moment. Eventually it would burn through, but you only hold it in place long enough to get a good seat for the shoe. Maybe 10 seconds or so.
This one's going to be a little shorter than previous posts. A little extra sleep tonight will be good for me and make tomorrow easier.
This is me, signing off.
Saturday, September 18, 2010
Eau de Equine Dentistry
For the uninitiated, let me state for the record that horse slobber has a unique odor that stays with you when you've had your hands in their mouths. Yes, I'm talking about floating teeth. What is that, you might ask? Well, the way a horse's mouth is, they wear their back teeth unevenly. The upper teeth wear more on the inside than the outside and vice versa for the lower teeth. And so the teeth form sharp edges on the side that recieves less wear. These edges need to be taken off so that the horse's mouth is more comfortable and they don't cut up the inside of their cheeks or tongue. Taking off these edges is called floating the teeth.
Now, I also know the next question that's going to be asked: How is this accomplished? A smart ass would simply say stick a rasp in the horse's mouth and take care of it. Which is almost correct. There's also a sedative and a speculum involved, though. The horse is given a mild sedative to relax them. It doesn't put them out all the way and they can still react if you piss them off. For the vet hospital people, it's a half cc of Domisedan given IV. You then stuff a speculum into their mouth so they don't bite you. This looks like a huge metal and leather contraption with ratchets on each side. There are two metal plates that the front teeth rest on and the ratchets keep the mouth open so you can work on the back teeth. You then stick a long handled rasp into the horse's mouth and file off the sharp edges. And you check your progress by sticking your hand into the horse's mouth and feeling the teeth. Mind you, this whole operation is done blind, since you can't see into the mouth while you're working on it. Of course, the horse isn't completely out and the speculum doesn't open the mouth wide enough to keep the horse from being unable to chew. So while you're working in the mouth, there's the added fun of the horse biting down on the rasp and pinching your fingers as you check your progress. Yep, the lasting perfume of horse spittle gets all over your hands and halfway up to your elbows as you feel blindly around in a horse's mouth, checking for sharp edges and trying not to get gnawed on.
In other matters, Hobbit had a great question about the reason for soleing out a horse's hooves at the end of post #2. In case some of you missed it, she asked if soleing out was like using a pumice stone on your own feet. The answer is actually more complicated than it might appear at first. I had to think about it for a few days to figure out how to explain it, because it's really a form and function answer. And the best way to explain it is with analogy and comparison. Bear with me on this one.
In a human, unless they have exceptionally flat feet, the arch of the foot doesn't touch the ground. This is because the arch is a point of expansion for the foot. When moving at speed, the foot spreads and the arch flexes toward the ground, thus absorbing and dispursing the shock and concussion of impact. This is also why flat footed people often have foot pain, because the whole of the foot impacts the ground and there's no place for the concussion to spread to.
Now to compare this to the equine foot (temporarily ignoring the physiological fact that humans are plantigrades and horses are unguligrades...I'll explain that later). In the horse's foot, the sole is like the arch of the foot. It doesn't touch the ground normally since the horse walks only on the hoof wall and frog of the foot. It also allows for a point of expansion as the horse travels at speed. The sole flexes toward the ground, helping to absorb the concussion of impact. But unlike the human foot, the sole keeps growing. Thus, a farrier has to pare out the dead sole to allow for the live sole to have a place to expand to.
Mind you, this is only one of many reasons why a horse's feet should be taken care of. Another reason is that like human hair and fingernails, the hoof doesn't quit growing. Especially since it's made of the same material as hair and fingernails. If the hoof isn't trimmed or worn away, it'll keep growing out of control. I've seen the result of this. The donkey had to be held down and the excess hoof cut off with a hacksaw before the feet could be worked on. The hooves had turned at right angles during growth and were growing out in front of the feet like skis. And farrier's tools are much more burly than what we'd use on our own feet. I certainly wouldn't want to use a kitchen cleaver to dig out a corn! Let me put it this way: To check the sharpness of our hoof knives, we routinely shave a small section of our arm hair off with it. If it cuts cleanly the first time, it's sharp enough.
Oh, that plantigrade/digitigrade/unguligrade thing. This one's pretty quick to explain. Humans and apes walk on their whole foot. This is called plantigrade. Carnivores and predators tend to be digitigrade, which means they walk on their tiptoes. What would be a human's heel is a predator's hock. Herbivores and prey animals tend to walk on just the very tips of their toes, which is unguligrade. This is equivalent to a ballerina in toe shoes, with just the point of the toes touching the ground. And in fact, all the toes are fused into one huge toe, for added strength in the bony structures. That's a different conversation, though.
Anyway, no new particularly significant injuries to report. Just some bruising, which is really becoming the norm around here. As usual, if there's anything specific anyone wants to know about the fun and havok happening here just post a comment or send me an email. I'll get back to everyone as I can and hopefully enlighten the unwashed masses in the process. *grin*
This is me, signing off.
Tuesday, September 14, 2010
Boneheaded manuevers

I burned the ends of my fingers yesterday. My index finger, middle finger, and ring finger on my right hand across the distal palmar aspect of each, to be exact. It was pretty stupid. I was trying to demonstrate to one of the new people how to hold a forepunch that he was working on. Somehow, I didn't connect the fact that he was not touching it to the fact that it was still hot. I mean, it wasn't glowing or anything like that so it didn't look hot. So, like a total bonehead, I reached out and started to grab the thing. Thankfully, I was wearing my gloves or I would have seared the hell out of my palm, too. I jerked my hand away pretty fast, so the damage wasn't too severe. Just a nice blister across those three fingers. The barn has a great first aid kit, mind you. I slathered my fingers in burn gel pretty quick and slapped band-aids across the three fingers. The moral of the story is that just because it's not glowing doean't mean it's not searing hot. lol!
In other news, I've had really good days in shoeing recently. I got my two basic front shoes approved, so now I'm working on forging a pair of basic hind shoes. I've been able to stay under the horses longer, so I've been getting a lot more done in one go. And I'm getting quite good at fitting shoes to feet and top dressing the hooves. I still have some problems driving the nails, but I'm improving. And I think I'm getting a good feel for how much hoof to trim off, so that's a good thing too. Overall, I can tell I've improved. Now I just have to put all of it together and get my endurance up so I can stay under a horse long enough to do more than one foot.
We had some real asshole horses today. A Tennessee Walker stud that was trying to impress the ladies, a mare that didn't want her back feet done, a pair of paints that wouldn't behave, just a hell of a selection today. We got them done, but some folks got shoved around today. Jade had to go to the doctor, but part of that was because he's also a bull rider and had gotten bucked from a bull on Sunday and hurt his ribs. He was the one that worked on the mare with the hind foot issues. I did one of her front feet and she was fidgety for that. But she just out and out didn't want her hinds done. She shoved Jade around pretty hard and his ribs were really hurting him tonight, so last I heard he was heading for a doctor. I'm guessing he gets Vicodin...
I know some of you wanted pictures, so I'll put a few up here. Today's photos are of the barn where we do all the shoeing and forge work, the pair of shoes I made that got approved, and what happens to someone's hand when they accidentally hit it with a hammer. The close up of the anvil is the one I specifically use. We each have one that we pick out for our own personal use for the duration of our course.


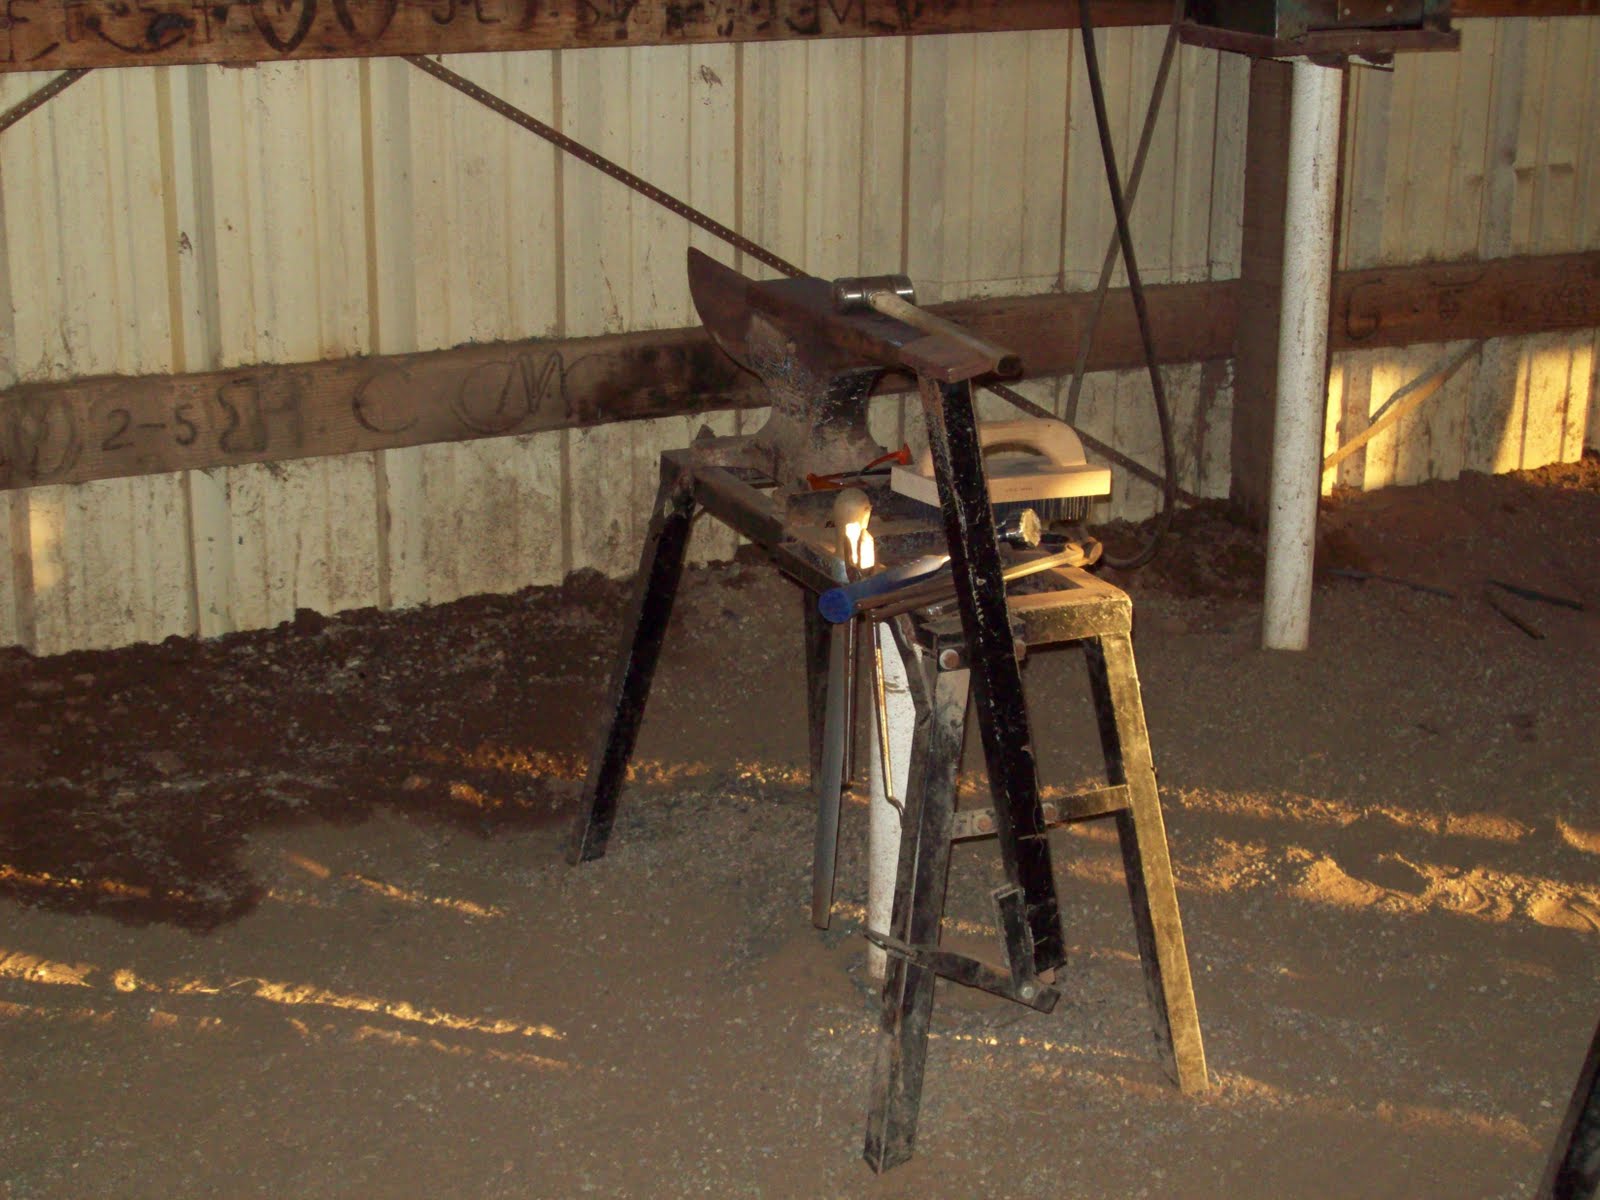


So there you have it. This is where I spend my days, from 9 am until 4 pm basically. As usual, if there's something you'd like to see or know more about, let me know and I'll try and get to it.
This is me, signing off.
Subscribe to:
Comments (Atom)